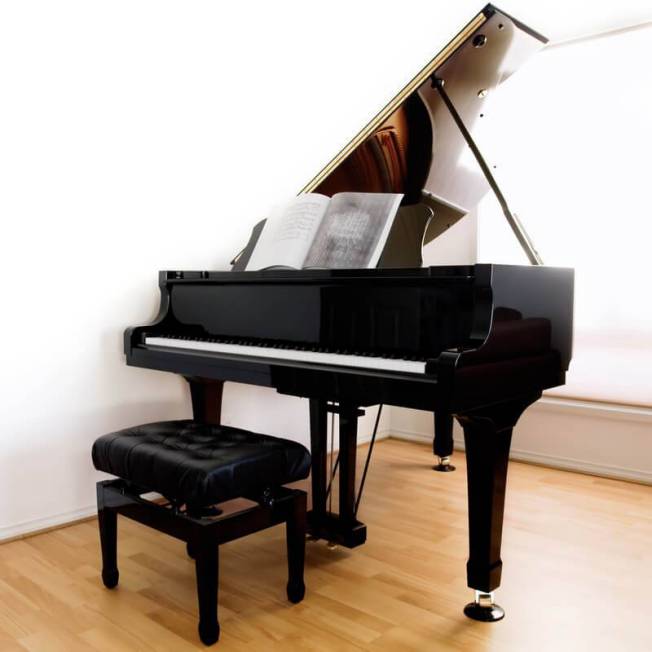
How to Move A Baby Grand Piano?

Moving from a place you have spent most of your life can be tough, because of different situations tied to it. Some of the issues that you are likely to face are trying to break the emotional attachment you have with the neighborhood you stay in, trying to truly convince yourself that you are moving and other related issues.
How to Move A Baby Grand Piano?

Moving from a place you have spent most of your life can be tough, because of different situations tied to it. Some of the issues that you are likely to face are trying to break the emotional attachment you have with the neighborhood you stay in, trying to truly convince yourself that you are moving and other related issues. Moving is very beautiful in the end, and you give a deep sigh of relief after a successful moving process, but remember, not all moving processes turn out to be successful.


It is very important that you pay attention to the type of moving company you choose as well as the quality of the services they offer. Even if you try to do some things on your own, there are just things that you will need help handling. In this article, we will be talking about how to move your baby grand piano, because it is a very important item you possess, and it is equally very delicate. We will be putting you through steps that you can take to move your baby grand piano safely from your current apartment to your new apartment without breaking a single thing.


What You Need To Know First While Moving Baby Grand Piano


Preparing your mind for the move is the most important thing you can do for yourself. The first thing you also have to realize is that there are two ways to go about moving the piano. One way is doing it yourself. If you are very sure that you have what it takes to disassemble the piano, then you can go ahead and do it yourself. The second way is for you to make sure you hire professionals to help you with the task. Do not try to cut down on cost by watching a few YouTube videos as a crash course on how to disassemble a baby piano. You might end up damaging your keyboard even more than you thought you were about to save on cost. Only use professionals on things you have no idea about, it’s fast, it’s safer.


As a rule of thumb, before you can move your baby piano, you have to be aware of the fact that it needs to be taken apart. First, it sounds scary, yeah? But not to worry, experts can help you with this. Speaking of experts, it is imperative that you know the company you are trying to hire also. Just because a company promises to offer you piano moving services for a low price doesn’t mean you should jump at the offer. Even if they offer a moderate or high price, it still doesn’t pass as being professionals. You have to do your research on whichever company you want to select. To do this, you should be able to run a search online and check the reviews provided by other customers about the local movers or the company you wish to use. Better yet, you can search for websites that offer specialized moving services for baby pianos and employ them.


The primary criteria for choosing any professional is making sure they have insurance. Insurance is your saving grace when they damage any part of your piano; this is something you would never get if you try to move the piano on your own.


The Actual Process of Moving Piano


We strongly recommend that you don’t have to bother about moving the baby piano yourself, but if you insist on doing it yourself, we have put together a list of some of the procedures to use in moving the piano. The actual moving process will be described in two sections; one is the disassembling section, and the other is moving the piano.


Disassembling The Baby Piano


We go bit by bit in this process, and the first thing you want to do is to take out the piano lid. The baby piano will be disassembled in an entirely different way from the upright piano. The baby piano also weighs about half the size of the upright piano and so we must reduce the weight by detaching each detachable part. To remove the lid, locate the little screws that hold it in place and remove them using your screwdriver. Be sure to have more than one screwdriver for this process, never lose the screws, except if you intend on not placing the lid back.


Now that you have taken the lid out. Wrap it carefully with a nice moving pad to help protect against any damage, scratch or harm. Make sure the lid is covered entirely by the pads till you cannot see the lid anymore. Blankets are also good substitutes for moving pads if you can’t buy one at the moment.


The next thing you have to focus on removing after the lid is the lyre. The lyre is that thing right underneath the piano to which the pedals are connected. They are made from wood and are fixed in with screws. This again is one of the reasons why you need more than one screwdriver. All you have to do is to remove the screw from the lyre and place the lyre separately. Take the screws and keep them separately. At this point, you need to keep the screw separately and label a bag for each screw to avoid confusion.


After removing the lyre. We would love to focus on taking care of the pedals. The pedals ideally are three, and each must be wrapped separately. Never try to wrap all three at the same time, you might stand at risk of breaking them. Make sure your moving pads are securely wrapped on each, and use tape to keep them firmly in place.


Resting the Piano Against the Board After Disassembly


The next thing for you to do is to get your piano to rest against its board. Your piano should have a piano board which is a wooden surface made for the side of your piano, and it can be used to strap the sides of the piano well enough. If your piano doesn’t have one, you can ask from a local music store and get one. Now you should rest the board against your moving pad while you try to remove the other legs. Never let the entire weight of the piano rest on the legs, the other legs are not firm enough to carry 500 pounds without snapping, so be careful.


The next step is an easy one. Once you have your piano board in place, you can rest the piano on that end and make it stand upright, sideways. Then you need to get your moving pads to wrap the piano. Make sure you buy the thick moving pads, and if you must use blankets at all, you have to use thick ones. Wrap the moving pads around it well, and use straps to fasten the moving pads securely onto the piano.


Remember the board? Yeah, this is where it comes in even handy. The board comes with straps that allow you to fasten the piano to its flat surface. Make sure the piano sits well on the board, and check again to see if the straps are tight enough not allowing any little movements out of place. Again, you can check out your local store for straps.


The legs of the piano are the next in line to be removed. It depends on the model of baby piano you use; some have three legs while others have four. The legs are attached to the piano using little bolts or screws which can be removed using an Allen key or a screwdriver. Carefully remove all the legs of the piano without damaging any of them.


The next set of items you want to focus on should be your legs and lyre. Take your legs one by one and wrap them all with the moving pads. Don’t place two together, they must all be wrapped individually, and not only that, but they must also be completely wrapped in such a way that they will be covered completely, till no wood can be seen. After wrapping them, use packaging tape to hold the moving tape in place.


Moving All Parts of The Disassembled Piano


For this section, we will be describing how you can move all the parts you have disassembled.


The most obvious part of the piano you will need to be careful about moving is the large part. After wrapping the piano properly, be careful to place it on a dolly. Make sure the dolly is formed enough and moves only in the direction you want it to, to avoid a situation of sliding and slipping out of your control. Make sure it doesn’t tilt in any way and make sure you have firm control over the dolly. Get your friends to help you move the sturdy dolly, an average of three persons at least should do to be on the safe side. Don’t allow children to handle it.


We would love to assume that the fact that you have chosen to move your piano yourself, you are also renting a truck to move it all by yourself. If this is the case, then this is how you should move your piano safely into the truck. Get a very strong plank and place it on the truck, and let the rest of the plank touch the ground. Then you get three to four of your friends to help move the piano on the plank. Split yourselves, let some be in the truck while others are outside to roll the piano in. Make sure you keep the piano in an upright position. If you have to move the keyboard down the stairs, try using a plank to ensure the keyboard stays upright. Please note, that you must not let the piano slip out of your hand.


Securing Your Piano Once It’s Loaded Into the Truck


After successfully getting the piano through the staircase and into the truck, the next thing is to get the piano fixed firmly in a position where it will not fall or slip. Make sure the piano is made to lie in a vertical position; this way you reduce the risk of having it damaged. See to it also that you do not place any item on the piano so that you don’t damage the keys.


It would be a smart move to try and get a separate truck for the piano to avoid an accident. The remaining parts of the piano can be kept in any position and anywhere in the truck because it is not as sensitive as the piano. But you still need to be careful about the placement so that you don’t break the legs or the lyre or the lid. Do these things, and you should be fine.


We are still back to emphasize that after you have read through the process of packing, and moving the baby piano, and you feel it’s something that is too stressful, you should go ahead to hire professionals to help with the task. Do not be tempted by the simplicity of the description; it might not as easy as you are reading it. To help you with an idea of companies, tailor your search to look for companies that specialize in moving all types of pianos, and not forget that they must have insurance.


On average, the prices of moving a piano vary according to distance, and weight but on average, if you are moving a piano within the same area then you can have it for between $200-$600. If you are moving to a farther distance, then the price will be more.


We have gotten you the most useful tips that you can use in moving your baby piano from the initial stage of disassembling it, to the stage where you can finally place it in your new apartment. We hope that you find these tips helpful and can share around with your friends who are trying to move their keyboards. Happy moving and have a great time.


Frequently Asked Questions


Can you move a baby grand piano while it’s fully assembled?


You can, but it’s not recommended. Removing lids, lyres, and other pieces of the piano are going to help reduce the weight of the piano, which makes it a lot safer and easier for you or your movers to transport. Disassembly can also prevent your piano from getting damaged during the move, as well.


What if I don’t have blankets?


You can typically rent moving blankets from the company that you are renting the truck from and/or hiring movers from. Moving blankets are thick and heavy, and they will offer layers of protection so that your piano doesn’t get scratched, bumped, or broken. Talk to your moving truck company or your movers and they can help you out here.


Should I hire movers or move it myself?


While baby grands are easier to move than other types of pianos, they are still incredibly heavy and need special knowledge and tools to be able to move properly. If you have experience and tools, then you can move it yourself. Otherwise, you’re likely better off calling a mover to help you out.


Conclusion


Your baby grand piano is important to you, and we understand that moving it properly is the best way to ensure that it’ll stay with you for years to come. Use our site to find movers that have experience in moving pianos so that you can have the most confidence in who can move your possessions most effectively.

TABLE OF CONTENT